Greetings, Monsters!
Today, we're excited to unveil the magic that a dash of effort and a sprinkle of crafting skills can work on our unpainted rocks and trees (or jazz up our pre-painted collection!).


We kicked off the transformation with a dark mat primer on the trees, aiming for deeper shadows within the lush canopy. Using various shades of green acrylic paints, we brought the canopy to life. Once dried, a gentle drybrushing with a lighter shade of green added captivating highlights.


Transitioning to the trunk, we played with different browns, adapting the palette to our vision. Whether it's a split tree or an aged stump, adjusting the inside colors can bring out the desired effect.


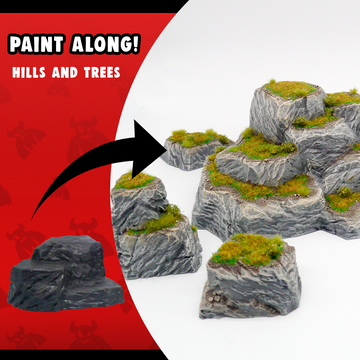
Shifting focus to rocks and hills, a solid coat of grey acrylic paint served as our canvas. A delicate drybrushing with pale grey on edges and pebbles brought out intricate highlights.


Now, it's time to get your glue and grit ready because dirt is on the agenda! Adjust the grit to match your aesthetic; no need to follow our lead precisely. For a less messy experience, we recommend using old Tupperware to sprinkle and tap off excess.


Once the grit is dry, add a touch of brown paint for shadow, followed by a light brown dry brushing. This creates depth, ensuring that when you apply flock, any exposed dirt feels dimensional.


To complete the masterpiece, bring out the glue and flock, and let your creativity run wild on the dirt patches. Voila, your rocks now exude magnificence!


Now, embark on epic adventures and, most importantly, share your creations on socials. Tag us in your pictures – we're eager to witness the beauty you've created.
Happy crafting!


